NoTouch OS Quick Start (Admin Guide)
Contents
- 1 Start-up
- 2 First Time Wizard
- 3 After the First Time Wizard
- 4 Central Management
- 5 Additional information and troubleshooting
- 6 Understanding NoTouch OS build Numbering
Start-up
Congratulations to having NoTouch OS live-booted or physically installed on your machine.
The graphical user interface automatically starts after power-on. Your network settings are automatically retrieved via DHCP, the graphics subsystem is launched with default parameters such as the best available screen resolution for your monitor(s), as the system displays the startup screen, most notably - the large window in the center of the screen - is the "First Time Wizard":
First Time Wizard
The wizard launches automatically on new devices and after doing a factory reset and helps you setting the most basic system parameters and configure a simple connection.
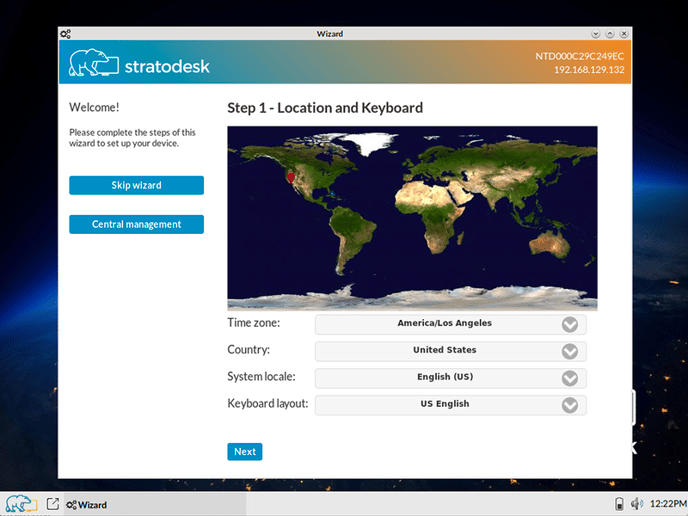
In most cases the system can detect your location and will try to preselect the right keyboard layout and language settings for you. If that does not work, please choose the settings manually: .
- your location and language setting (the "locale"), as well as the keyboard layout,
- your time zone
- the screen resolution (most people will leave the default "auto" as it is)
Then press "Next" to continue.
A first connection
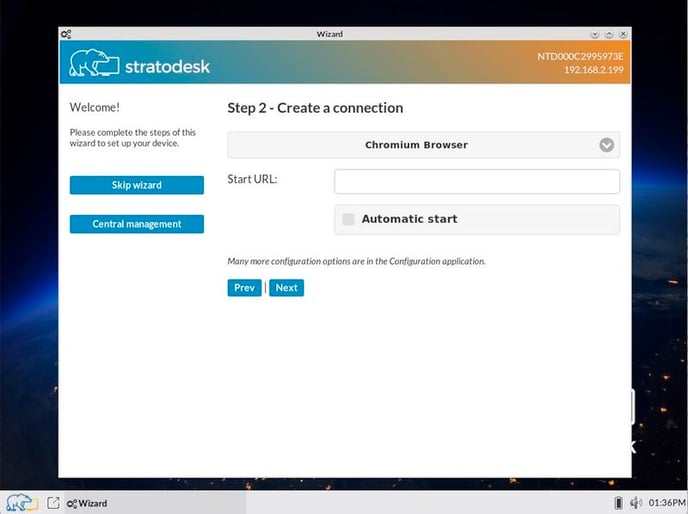
What is a thin desktop without a connection to a server? If you already have your server farm in up and running, you can configure a connection (sometimes referred to as "session" as well) right now. You need to know how you will connect and where you want to connect to.
The wizard is designed to be simple, so it offers only a very limited amount of connection types here. However, NoTouch OS is a very flexible OS, in the actual system configuration many more connection options are available!
Typically, "how" to connect refers to a protocol (such as RDP, ICA, PCoIP) or a specific client application (rdesktop RDP client, Citrix Receiver, VMware View client, etc). "Where" to connect to refers to a host name, an IP address or a URL, depending on the "how". See more about connections here: Connections
If you do not want to configure a connection now, don't fill in anything.
When done, press "Next" to continue...
Password
Now it is time to enter your system administrator password. It is required to enter the configuration and make changes to system settings.
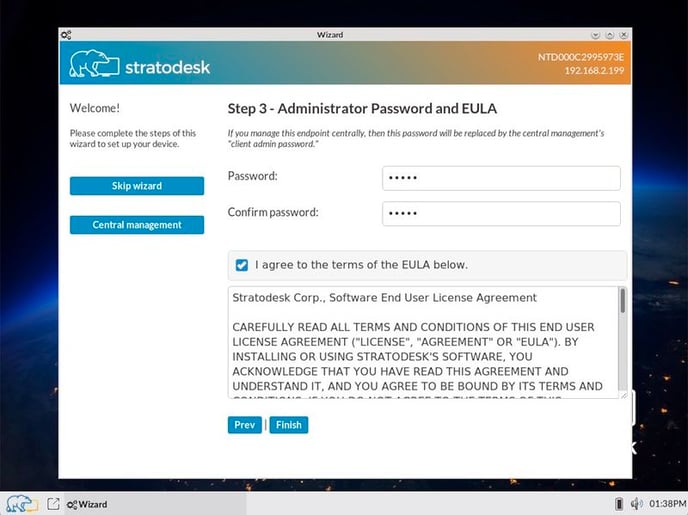
When done, click "Finish".
Summary
The next screen is just a friendly information that you have completed the First Time Wizard and the system has stored the configuration.
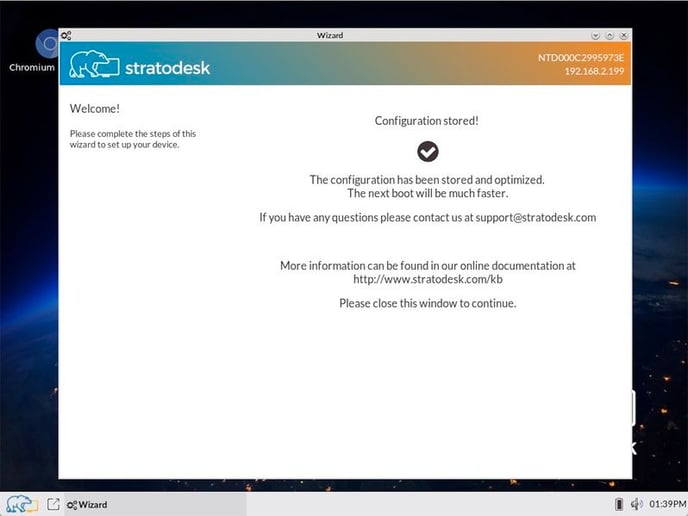
A lot of magic has been going on inside, and the system is now ready for prime time. Just close the window now and enjoy exploring your new thin endpoint...
After the First Time Wizard
After finishing the First Time Wizard, the system displays its standard desktop, with your configured connection.
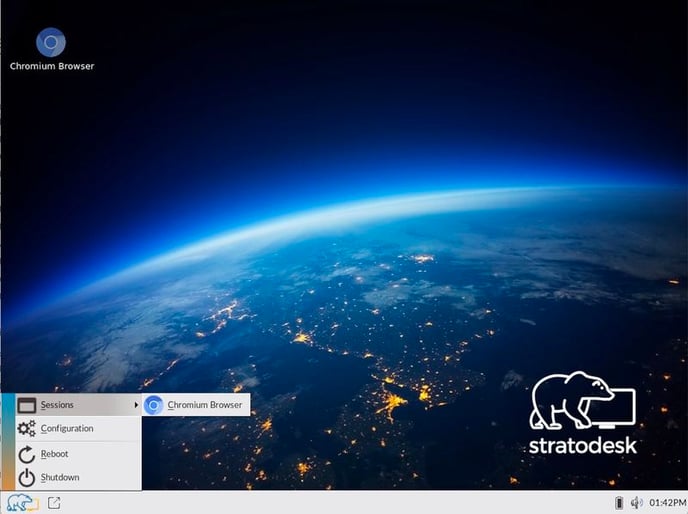
Congratulations! You can launch your connection either via the desktop icon or via the start menu (you can later on define if you want your connection to be shown as a desktop icon or not, this is just the default setting). The start menu also offers the following options:
- Access system configuration, for example to modify system settings or to create or modify your connections
- Reboot the device
- Shutdown the device
Central Management
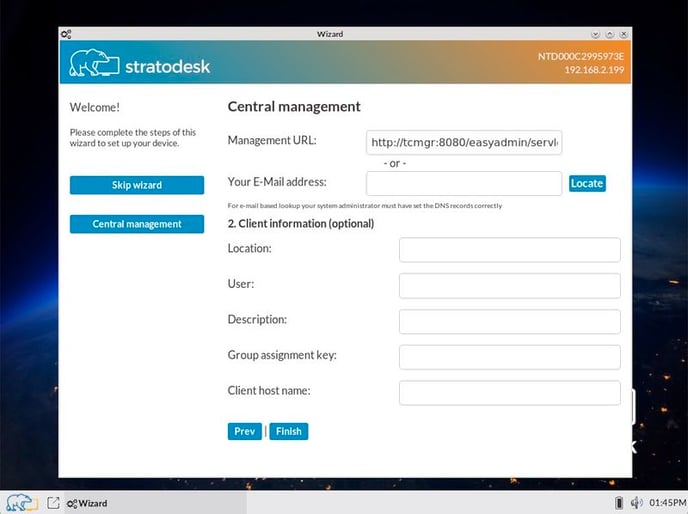
If you intend to use NoTouch Center, you do not need to configure the device locally. In fact, you do not even have to go through the First Time Wizard. NoTouch OS will always try to find NoTouch Center and if you have set everything up it will find NoTouch Center. Please see here for all available options: Short introduction (NTC)#Connect clients and NoTouch Center
Now speaking of the First Time Wizard, you can use it not only to manually enter the URL, but also use the E-mail based management server lookup, allowing non-technical end users to simply type in their email address and have the NoTouch Center instance found via a DNS query done in the background. Also, you can supply other information that can be used in NoTouch Center for inventory or Auto-assign purposes.
The username, location, description fields are essentially free-form text fields that are not interpreted by NoTouch. Use them for whatever you like. You can use these fields with Auto-assign automatically assign this machine into a specific group. The "Unique Group Key" field is special, because it relates to the field with the same name "Unique Group Key" that every group in NoTouch Center has. It allows for clients to be added directly into a specific group. See Auto-assign#Unique group key for more information on that.
Additional information and troubleshooting
Do you have any problems or questions? Please search our knowledge database! If you can't find a solution here, please do not hesitate to contact our support via e-mail at support@stratodesk.com. For the latest software changes log into our customer portal at https://www.stratodesk.com/login. If you do not have a login and password yet, please contact our support.
Understanding NoTouch OS build Numbering
For a complete understanding of NoTouch OS builds and numbering schema please see Understanding NoTouch build taxonomy
