The BeyondTrust installer that Stratodesk supports:
- Linux ( .bin file )
STEP 1: CREATE A LINUX JUMP CLIENT FROM BeyondTrust APPLIANCE
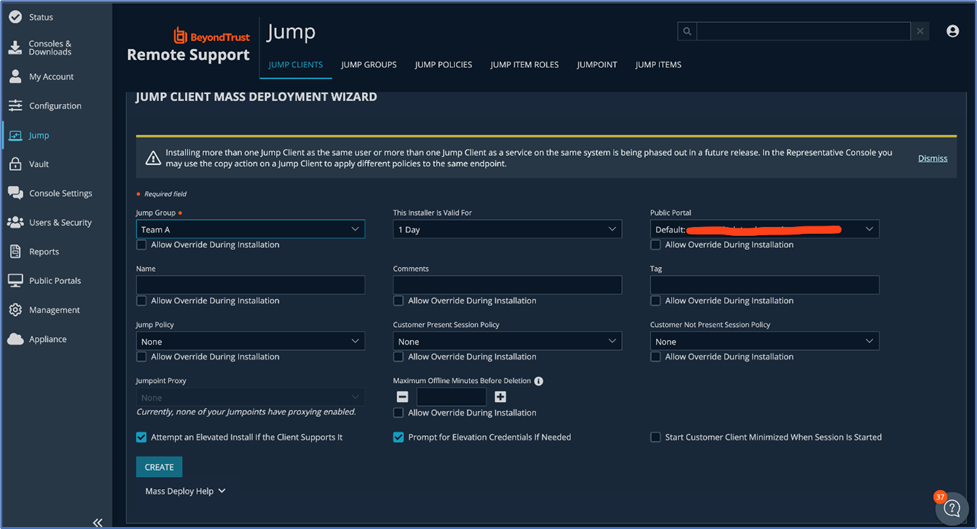
Below is a screenshot from the BeyondTrust dashboard where the installer can be created.
STEP 2: IMPORT JUMP CLIENT INTO NTC MISC FILES
Once the installer files are created, those files need to be uploaded to the Stratodesk NoTouch Center (NTC).
- Log into NTC
- In the NTC, navigate to “Resources” and then to “Misc. Files”. You can then drag and drop files into the upload window. (Note, please leave this window open until the upload finishes.)

The installer files are stored in NTC “Misc” section of the “Resources” section in NTC. The URL is added to Extensions->BeyondTrust URL
Most of the settings are configured on the BeyondTrust Jump Client dashboard itself as seen in the first screen shot above. The installer has parameters under Services->BeyondTrust which can be used to override the parameters set in the dashboard while downloading the installer.
STEP 3: CALL BeyondTrust JUMP CLIENT VIA EXTENSION
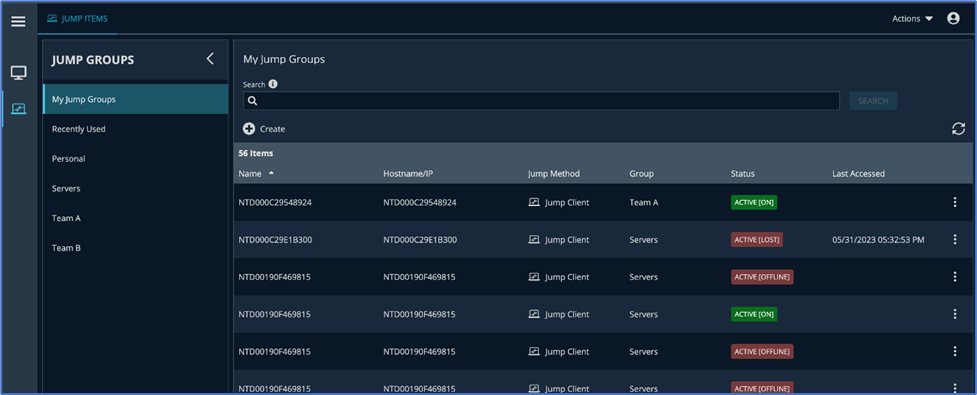
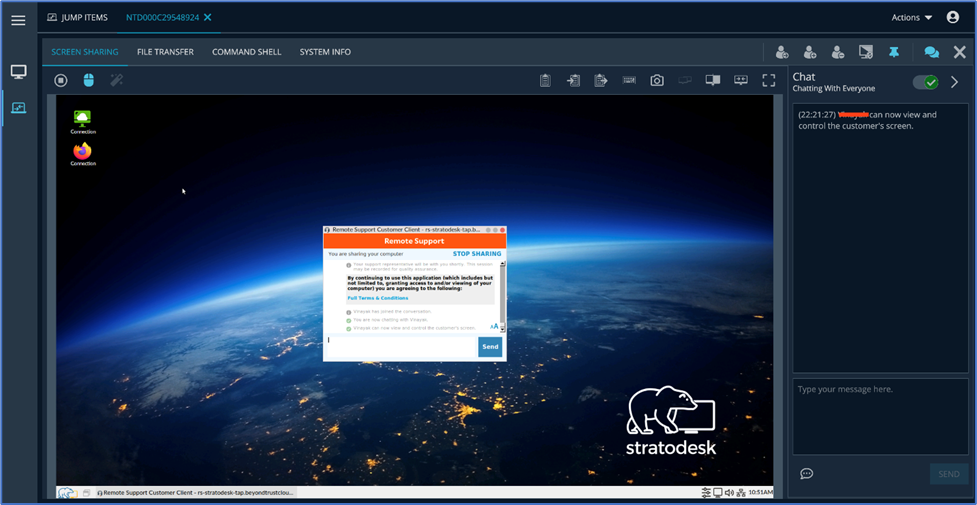
Once the Extension parameter is set and the end point is rebooted, The ByondTrust Jump Client is installed on boot up and directly connects to the Jump Client dashboard. Below is a screenshot of how it appears in the BeyondTrust dashboard and a screen shot of when you connect to it.
**Note in the screen shot below, you will find the value "Maximum Offline Minutes" . It is recommended to set this value to 1. This will allow the Jump client to expire on the Beyond Trust console after reboot in effort to prevent Duplicate device entries on the console
