Stratodesk Virtual Appliance comes with a self-signed certificate to enable basic HTTPS functionality. Obviously, a self-signed certificate is as good as no certificate at all, and must be replaced with a real certificate from your preferred trusted Certificate Authority for production usage.
Contents
Uploading an existing certificate and private key
If you already got a certificate for the machine you can apply it right away. In this case your security administrator will have provided you two files, a certificate (.crt) and a private key (.key) - if you instead got only file, please ask them to convert to .crt/.key. If you were also provided with a third file, a certificate chain file, that's great, please do upload this as well, as not having the certificate chain correctly configured can lead to all sorts of strange behavior later.
Browse to your Stratodesk Virtual Appliance and click Virtual Appliance (Container) Administration to log into the VA administration console. On the left side, click Certificates and select your certificate, certificate key and certificate chain and press Upload.

The result should look something like this
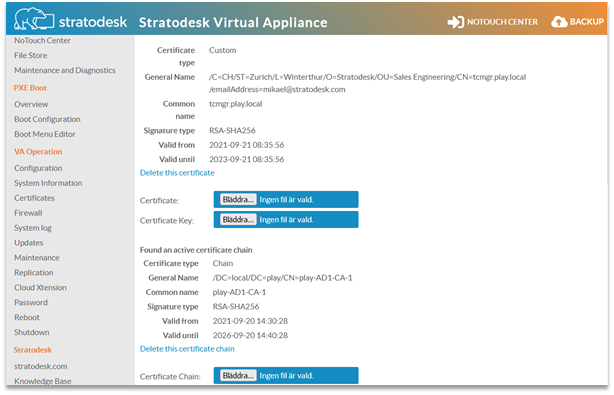
After this, reboot your VA. Now, when you access NoTouch Center, your certificate should have been changed from the default self-signed one to the one you just uploaded.
Generating the certificate
This sections describes how to create your certificate from a CSR (certificate signing request), using an established Certification Authority.
Generating the Certificate Signing Request (CSR)
You can easily generate a CSR using the openssl. Mac and Linux system have it installed by default. You can alternatively generate it directly on the Virtual Appliance, simply log in via SSH. Issue the following command:
openssl req -new -newkey rsa:2048 -nodes -keyout server.key -out server.csr
Answer all the questions correctly. You don’t need to specify a challenge password and a company name. The "Common Name" should match your DNS host name.
After this you should have two files in your working directory, server.csr and server.key. Save the key somewhere safe.
NOTE: This is your private key to your certificate, please keep it safe. Anyone who has both the private key and the certificate will be able to use your certificate!
Submit the CSR request to a Certification Authority
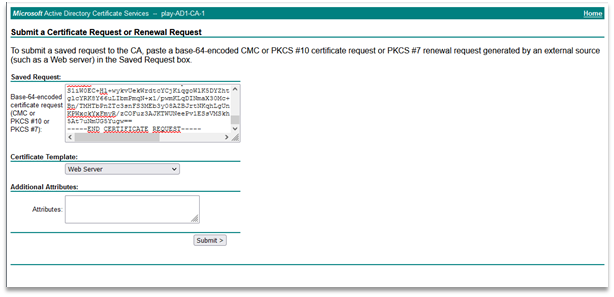
In this case we will use the Active Directory Certificate Services web based certificate tool. On your Windows Server browse to https://your-server-url/certsrv, and click Request a certificate. Choose to submit an advanced certificate request. Cut and paste what you copied into your text editor in the last step into the Saved Request window and choose Web Server as Certificate Template.
Next, download the certificate as Base 64 encoded that was issued and save it somewhere handy. After this, download the CA certificate (again, Base 64 encoded) from the home screen of your Active Directory Certificate Services web page.
Uploading the certificate to the appliance
Browse to your NoTouch Center server and click Virtual Appliance (Container) Administration to log into the VA administration console. On the left side, click Certificates and select your certificate, certificate key and certificate chain and press Upload.
The result should look something like this
After this, reboot your VA. Now, when you access NoTouch Center, your certificate should have been changed from the default self-signed one to the one you just uploaded.