Update: In Q1 of 2023 we introduced updated MS Azure Virtual Desktop (AVD) client code that has critical updates in alignment with the Azure infrastructure. All customers MUST update the production NoTouch OS to a client version that is at least 3.4.788 no later than August 15 2023. NoTouch Center and NoTouch OS Administrators should login to the Stratodesk Customer Portal to retrieve and deploy the latest updates.
Stratodesk NoTouch OS has the Azure Virtual Desktop client integrated, for x86 or ARM/Raspberry Pi based devices. Our AVD implementation supports the Microsoft WVD client for Linux features, everything can be configured and managed via the Local NoTouch OS Interface menu as well as centrally with NoTouch Center.
This article gives an overview of the configuration steps. We assume that you basically understand how NoTouch OS is configured and especially how server connections are created and configured.
Creating the Microsoft AVD connection is simple, create the connection type and the client will connect to the Microsoft resources where your credentials will direct you to the services that have been provisioned for you by your Azure Administrator.
1. Create the connection from within NoTouch Center by choosing New Connection, Connection Mode, Select Azure Virtual Desktop (AVD)
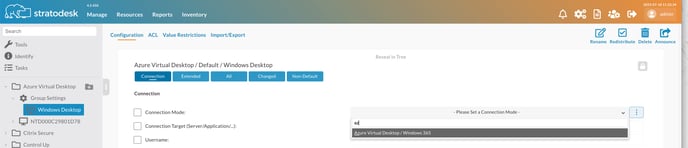
2. After choosing the connection mode, if additional parameters are needed for your connection, you can select Windows Virtual Desktop tab to make the appropriate settings

3. If no additional parameters are required, you can announce the settings change via NoTouch Center and your Endpoint should be provisioned
Additional configuration options - Below are additional configuration parameters available on the Azure Virtual Desktop/Windows 365 tab, as well as the default setting:
RDP Filename: This is where you want to name the specific desktop or application you want to automatically start once authenticated. For example, if I have a desktop called SessionDesktop in a published resource called Win1123H2, then I need to add Win1123H2||SessionDesktop.rdp so this is in the format of Workspace||Resourcefile.rdp. An example of how this looks is below and is configured as part of the connection under theAzure Virtual Desktop / Windows 365 parameters.
 Please note that if this method is chosen then there is no application chooser, and applications are not shown in the start menu or desktop. Please note that you need to be running NoTouch OS version 3.5.65 or newer to use this feature.
Resource feed URL: In most cases, you shouldn’t need to add anything here. US Government customers will use a separate url than the default, but for convenience we’ve added a separate field for this called Azure Cloud, which is set to auto by default, but can be configured with either public or U.S. Government.
Directory ID: This is now legacy and is only used to support older AVD images
Audio Forwarding: This refers to speaker, i.e., audio "out". Used for normal RDP session audio, not to be confused with Microsoft Teams which has its own optimisation parameter.
Microphone (audio in) Forwarding: This is turned off by default because of privacy, and is used for normal RDP session audio, not Microsoft Teams which has its own optimisation parameter
Printer forwarding: When configured, this will forward all printers that are defined in the local system to the virtual desktop session.
Webcam Forwarding: This parameter like the audio & microphone forwarding has nothing to do with Teams Optimization. It is for all other cases where you need a webcam in the VDI session. (e.g. Google Meet, GoTo Meeting or so)
App Chooser: When enabled this permanently displays the resource feed chooser on this screen, so is one of the easiest ways to have access to multiple applications rather than the desktop
Desktop Icons: When enabled this permanently displays all available application & desktop as icons on the Stratodesk NoTouch Desktop.
Start Menu Integration: When enabled this displays the resource feeds in the start menu.
One Connection Only: When configured, this will automatically disconnect the session once an application or desktop session has been closed. If a user, then wants to start a different application or desktop they will need to re-authenticate before they can do so.
Smart Card Forwarding: This forwards attached smart cards to the virtual session. Please note that for this to work correctly, PCSC service need to be started which are configured in the Services Group Settings.
Teams Optimization: When enabled this optimizes Microsoft Teams in the session. Please note that that this feature is currently experimental. You can verify that Microsoft Teams is optimized by going to ‘Settings/About/Version’ If configured correctly, will show that ‘AVD Media is Optimized’.
Shortpath: This refers to a very specific RDP feature, please refer to appropriate Microsoft documentation for further configuration.
Use Server Timezone: This disables the automatic timezone forwarding and just uses whatever time Windows believes it is. Note – For timezone forwarding to work, the DWORD EnableTimeZoneRedirection needs to be set in HKLM\SOFTWARE\Policies\Microsoft\Windows NT\Terminal Services.
Include System-Defined Drives in Mapping: By default, NoTouch OS reserves drive Z: that relates to where the local device mounts removable storage. If you want other, session specific drives, please refer to our knowledge base for further information.
HTTP Proxy Address/Port: This allows for proxy configuration.
Auto logoff timeout (seconds): If you don’t have ‘Only one connection’ defined and you have launched as session (desktop or app, doesn’t matter), and you’ve closed that one, you will still be authenticated to the AVD environment. Now if you have not started another AVD session before the timeout timer is reached, you will be logged off. This is to prevent people who think they are logged off when they close an app / desktop, to walk away, and then someone coming after them and starting a session with the credentials of the previous user.
Mouse Scroll Speed: As the description suggests, this controls the mouse scroll speed and can be set between a value of 0 and 100, with 20 being the default. The higher the value, the faster will the mouse wheel scroll.
Command Line Parameters: The Stratodesk AVD/W365 client program, ntavdc, has additional options that allow to you to customize the client further. The following parameters might be useful:
- --disable-stratodeskvc: This disables the Stratodesk Virtual Channel, in the even that this causes an issue with the user’s session.
- --always-download-feeds: When configured, it will not ask the user if they want to download additional discovered resource feeds but will do this automatically.
- --never-download-feeds: When configured, it will never download discovered additional feeds.
- --disable-integrated-remoteapp: When configured, it will keep RemoteApp support but will disable the integrated (RAIL) remote app support - that is then the experience you currently have on a Raspberry Pi, one window that contains the apps. I will talk more about Remote Apps Integrated Locally.
- --Debug: This will enable debug mode for the AVD client.
Dual Credential Login: This is now legacy and is only used to support older AVD images.
Azure Cloud: This allows you to choose either public which is the default setting, or U.S. Government.
Connecting to Azure Virtual Desktop
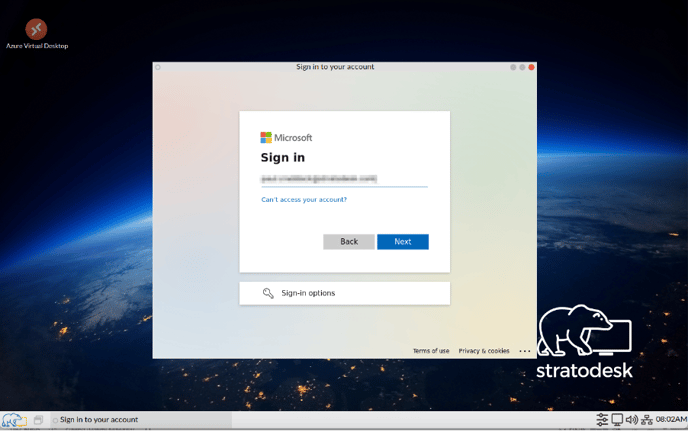
4. Launch AVD client and enter username.
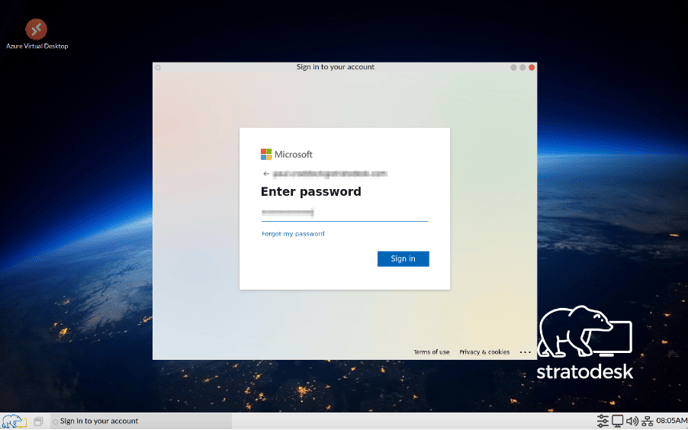
5. Enter Password and any other MFA prompts.
 6. Once authenticated, the following message prompt will appear on screen.
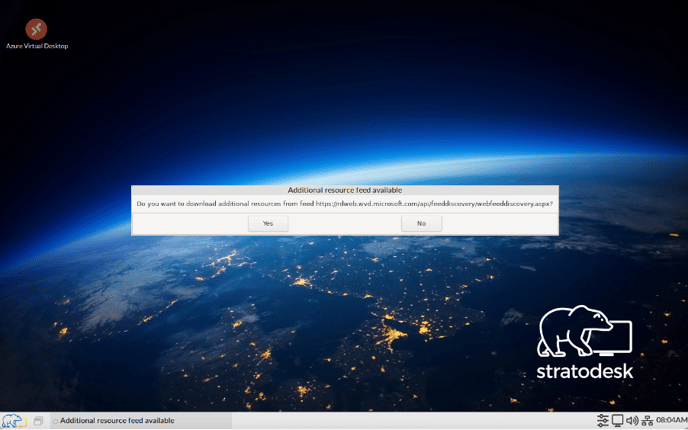 If you click no, then it will load the default resource feed. If you click yes, then it will prompt you to login with your username & password for the additional resource feed that you want to download.
If you know that your users will not need to download an additional resource feed, then you can always configure the ‘Command Line Parameter’ with ‘--never-download-feeds’ which will then bypass this message and will then launch the resource feed wither to the desktop chooser, icons or start menu depending on how its been configured.
AVD/Windows 365 Update
Again with the introduction of NoTouch OS 3.5.65 & NoTouch Center version 4.5.585, there are some new features.
Microsoft first provided the AVD SDK which is used by Stratodesk with a 1st-party App ID ("client ID"). More recently they have switched to requiring partners like Stratodesk to register their own Azure application and use its app id ("client id") for connecting.
This means that every Stratodesk customer that is using AVD (every tenant, to be precise) needs to have an administrator give consent to users accessing its resources from said app id/client. The page explains how this can be done, and only needs to be done once for each tenant.
Further guidance can be found in the following article from Microsoft. However, in a nutshell you need to grant tenant-wide admin consent URL in the following format:
- {client-id} is the application's client ID (also known as app ID).
- {organization} is the tenant ID or any verified domain name of the tenant you want to consent the application in.
The AVD client/app-id is: a85cf173-4192-42f8-81fa-777a763e6e2c
Once the full url is entered into a browser by an Azure administrator, you’ll be asked to confirm the permissions. Please note that this only needs to be done once for each tenant ID.

One of the benefits of the app-id is that you can create conditional access polices in Azure that limit which endpoints can access AVD resources. So, if this is set to only allow access from devices where the app-id is set to 6febedc3-7ad3-4225-802b-2f9ca2e759c7 then if the user tries to access the resources from say a web browser then access could be denied if this is how the conditional access policy has been defined.
Another benefit it this addition, is that it allows automatic login to AVD\Wind365 resources. For this to work, you should configure your connection as shown below.
 The ‘Azure Authority’ parameter is essentially the url you would use if connecting via a web browser. Based on the parameters above a NoTouchOS endpoint will automatically start the AVD connection, log the user in and launch my published Windows 11 (SessionDesktop) without the need for user interaction.
We’d only recommend automatic login in certain use cases as this could create a security risk.
*Tech Notes
Time Zone - Redirection - You may have to use gpedit.msc in the Host Pool to modify Group Policy for the Time Zone Redirection to work correctly. The GPO that may need to be modified
[Administrative Template/ Windows Components / Remote Desktop Services / Remote Desktop Session Host / Device and Resource Redirection / Allow time zone redirection]