NoTouch can be installed directly from inside Windows with an MSI package. The big advantage is that you can roll MSI packages out without any third party tools without any user interaction on the individual systems.
This installation procedure supports at least Windows XP, Vista, 7, 8 and 8.1.
Please note: This will overwrite Windows. It is supposed to be the "last" thing you ever do on the old Windows. If you simply want to test NoTouch or run side-by-side, please see Live Boot. You can actually use the MSI file to also run NoTouch side-by-side with Windows by creating the C:\wininstall_config.txt file, see below for more information. But beware, the default is to repurpose.
There are other installation options as well. You can create bootable USB drives, burn a CD-ROM or use PXE boot. For these other options, please see here: Install NoTouch OS
Contents
- 1 Warnings first
- 2 Getting the MSI package
- 3 Manual installation
- 4 Control MSI file behavior
- 5 Mass rollout with group policies (GPO)
- 6 Troubleshooting
Warnings first
This package is intended to make an unattended mass rollout possible, i. e. repurposing a large number of PCs without user interaction. It looks and feels like a regular Windows MSI package, the only difference is that there is no uninstall - it will reformat the hard drive, overwrite Windows and install NoTouch.
Please do not store these packages on (semi)public shares - one of your coworkers could be tempted to try it and then destroy his work machine. Test the package on a dedicated test machine, do the rollout on the machines intended to be converted, and then delete the dangerous MSI packages.
Deployment to UEFI and Secure Boot enabled device is not supported
Getting the MSI package
Download a published MSI
NoTouch is available also in form of MSI packages. So the easiest option is probably to download an MSI package.
How to create your own MSI package
If you are not able or willing to download an MSI package, you can have your own created easily:
- Install the free WiX toolset from http://wixtoolset.org/
- Extract the NoTouch .ZIP file - Use "Extract All...", do not simply click into it
- Only if there is a published MSI-Generator-Toolkit for this version, unpack it 'over' the unpacked ZIP
- Run "CreateMSIPackage.cmd"
Please note that official NoTouch MSI packages are signed with Stratodesk Corporation's code signing certificate. If you generate your own MSI package and don't have a certificate, make sure you allow installation of unsigned packages.
Manual installation
First, copy the MSI file to the target system.
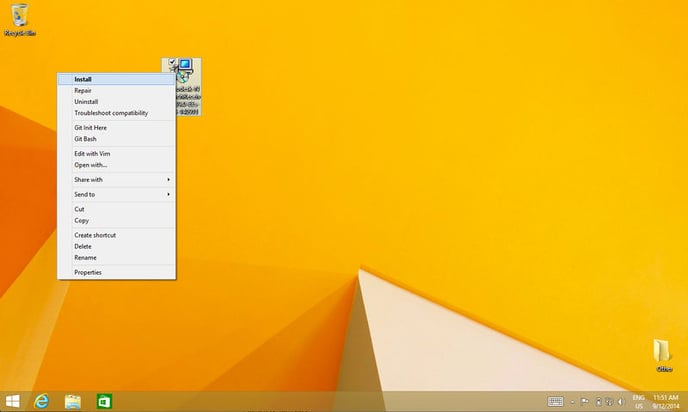
Double-click it or right-click and select "Install".
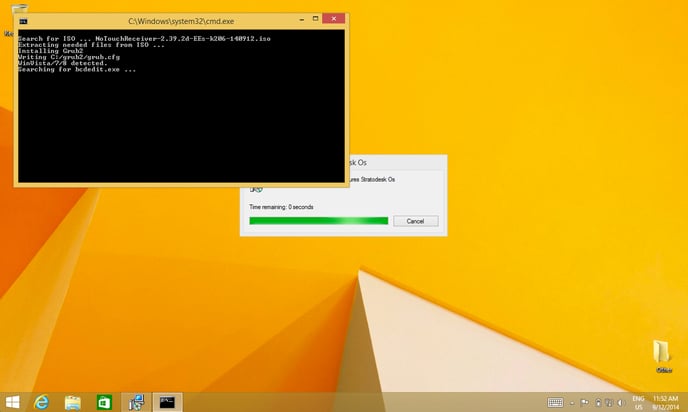
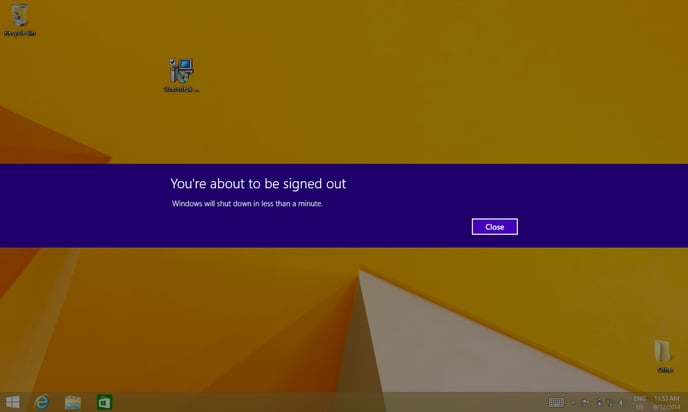
At this point, the system will ask a few questions. The idea here is to make sure people know what they are doing. In a real mass-rollout you will have the config file rolled out and these questions will not be asked (see below). The system will do some magic - no further interaction necessary. After some time, it will request a reboot.
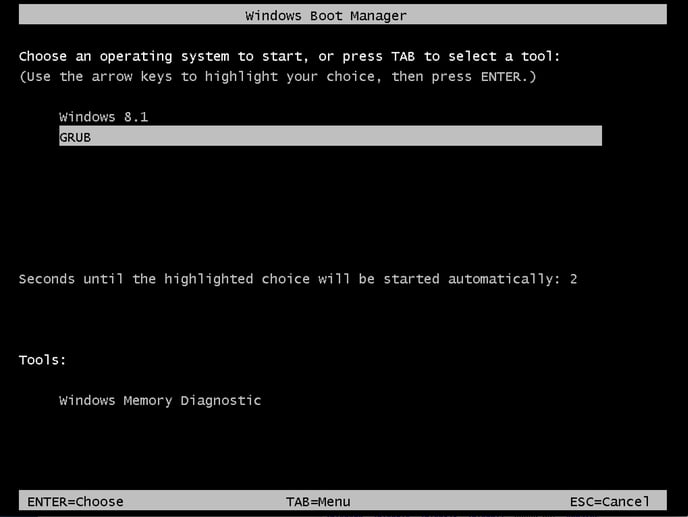
On the reboot, if you are fast enough, you will notice that the boot loader is now different. Again, no interaction necessary, just let the system do what it is supposed to do:
Then the regular text-based NoTouch GENESIS installer will come up, run through all of its steps without any user interaction and reboot again.
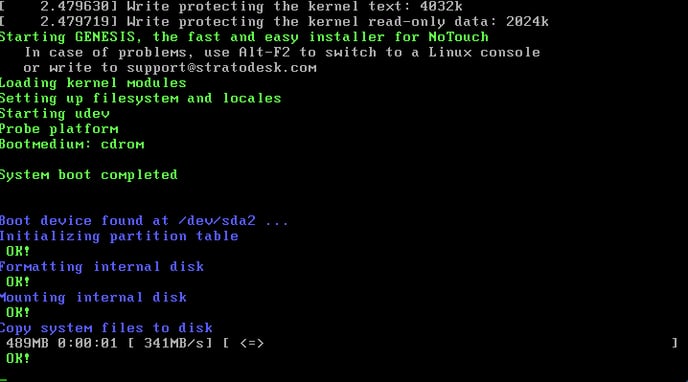
Congratulations. Your PC has been upgraded to a NoTouch VDI endpoint.
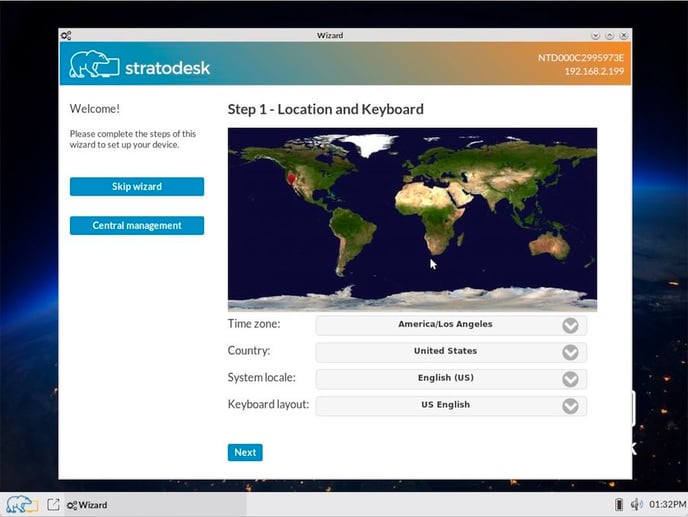
If you have everything set up for automatic connection with NoTouch Center, your system will be configured automatically. If not, the first time wizard will appear (as pictured). In that case, please continue here: NoTouch OS QuickStart.
Control MSI file behavior
You can control the behavior of the MSI file, for instance tell it to create a dual-boot installation instead of overwriting Windows.
For this, create a text file on the target PC with this name before installing the MSI (we assume you will at the end of the day have this being created automatically on many many machines):
C:\wininstall_config.txt
The content of this file should be as follows:
- mode=dual|replace (choose "dual" for dual boot)
- kparams= (kernel parameters if needed, optional)
- notdefault (don't setup NoTouch to be the default boot entry, optional)
- auto (for unattended "replace" installations, optional)
Please test the installation first on a single test device before rolling it out to all devices, obviously.
Configuration Preload
It is also possible to apply a pre-made default configuration: Configuration preload#MSI file
Mass rollout with group policies (GPO)
There are many tools available that support easy rollout of MSI packages. However, there is no need for any 3rd-party software, you can do this right with plain Windows.
Let's assume you have the MSI package downloaded and put on a file share where "Domain Computers" have read permission (Use "Share with"/"Specific people").
The user account your are using to install the file must have full administrative access (emphasis on "full" - we mean it!)
- First, create the configuration text file (see below) and roll it out with regular GPO means!
- Make sure you have the "tcmgr" DNS host name or alias configured and that it points to NoTouch Center (as described in Short introduction (NTC)#Connect clients and NoTouch Center
- Open "Group Policy Management" from "Administrative Tools" in the Start Menu.
- Click your way through "Domains", your domain and search for "Group Policy Objects".
- Do a right-click on the "Group Policy Objects" folder, click "New", and assign a name.
- Edit your new policy - In the right pane on the bottom, there is a box that says "Security Filtering". Remove the "Authenticated Users" entry. Add either the group "Domain Computers" for all machines or specific computer names, depending on where you'd like the software to be deployed.
- Go back up to the domain folder folder (in the navigation pane) and right-click it. Click "Link an existing GPO". Click your new GPO's name and click OK.
- Now go back to the GPO under "Group Policy Objects" folder, and right-click it. Click on "Edit". A new window will open.
- Navigate to "Computer Configuration" / "Policies" / "Software Settings" / "Software installations". Right click inside the empty pane on the right and go to "New" / "Software Package".
- A new window pops up - navigate to the share that you created earlier (\\MYSERVERNAME\FOLDERNAME), not the physical folder on the server (C:\SOMETHING\FOLDERNAME), and select your MSI.
- Click the "Assigned" bubble and then click on OK.
- Now close all of your windows on the server and reboot all of your workstations. They will install the NoTouch MSI before the computer allows a user to logon (that means, the computer will have a "Please wait..." banner for some time.
Note: It may take two or three restarts for the server to update the GPO on the workstations.
After that, you'll find all machines in NoTouch Center ready to be configured. If you have set up Autoassign they will get their configuration automatically, if not, add them to the groups where you want them and they will be configured by NoTouch Center.
Troubleshooting
- In case the system does not start into Linux afterwards, most likely you did not have the correct permissions. Remember, you need full administrative permissions otherwise you won't be able to modify the boot loader configuration!
- If the system starts into Linux but then can not boot properly most likely you have the wrong kernel version. Please try a different kernel version image.