Accessing NoTouch Center
Using the Stratodesk Virtual Appliance is very easy
Start your web browser and point it to the Stratodesk Virtual Appliance. Click on "Management" to access the NoTouch Center control screen. Click on "Log in to NoTouch Center"
You can of course bookmark https://my-va/easyadmin to go directly to NoTouch Center.
NoTouch Center Login
The NoTouch Center login screen will appear immediately after connecting to the correct URL:
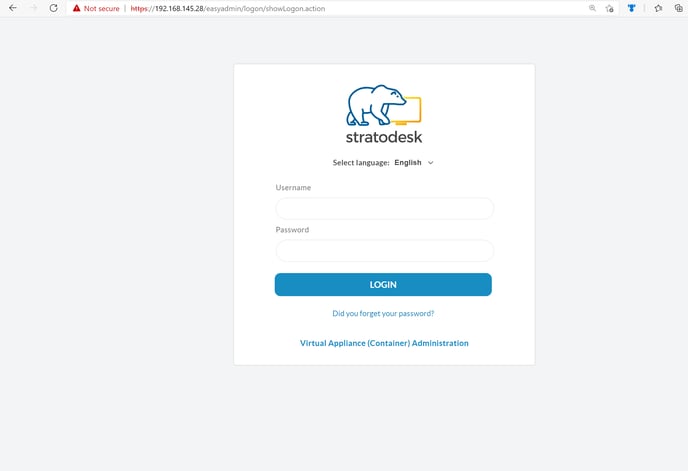
Use the username admin. The password is what you have set during deployment of your Stratodesk Virtual Appliance.
Side note: Did you notice that small link saying "Virtual Appliance (Container) Administration"? This will bring you to the administration of this instance of Stratodesk Virtual Appliance.
Dashboard and screen overview
NoTouch Center will present the dashboard directly after successful login. On your first visit this page will be quite empty, but don't worry, when using NoTouch Center this changes fast.
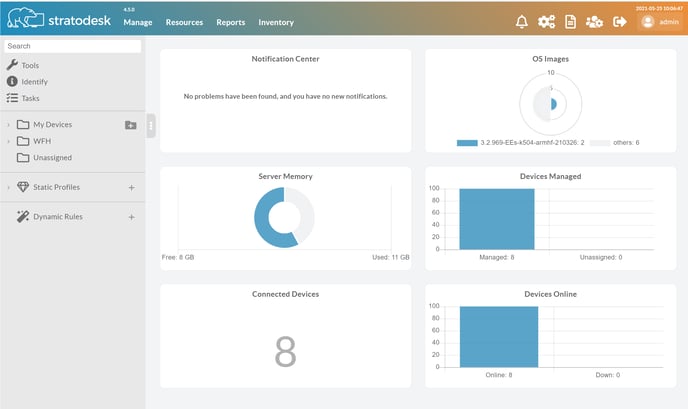
The NoTouch Center screen is composed of several sections:
- Main Menu. Located in the upper left region, it provides access to the productive functions
- Manage groups and clients
- Service Center to manage images, licenses, updates, support, runtime information, etc.
- Reports to print nice-looking reports
- Inventory for keeping track of peripherals
- Settings. Located in the upper right region, these icons allow access to NTC's own configuration
- NoTouch Center Settings (the yellow gears-type icon)
- Log (activity history and error messages)
- User administration (meaning users that are allowed to use the NTC)
- Client/Groups bar on the left
- Quicksearch field
- Tools to interact with client devices: Search for client devices, Filter
- Config-Bundles (formerly known as Profiles)
- Identify to provide a fast and efficient way to find out on which machine somebody works
- Tree view of groups and clients
- "Dashboard", the largest part of the screen; the content of this changes upon context
Client administration
The main purpose of NoTouch Center is to centrally manage client devices. To change configuration values of your client devices first decide if you want to change clients individually or - much preferred - on group level. The actual editing is very simple:
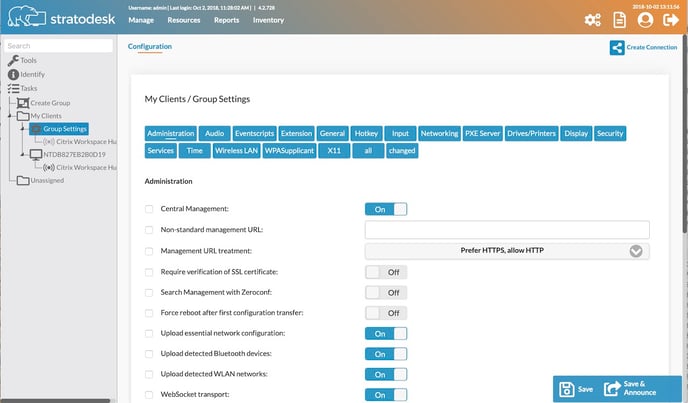
Click on the main menu item "Manage", choose the group or client in the tree view on the left and then choose the setting to change (note the categories above the parameter list). Change as desired, and afterwards click on Execute in the lower portion of the screen to save the values. At first your changes will be saved to the database, and as soon as contact is established with the affected device(s) - usually a background task, done asynchronously -, they will pull the new configuration. If you don't want to wait for that to happen, you can force clients to immediately fetch the new configuration: Announce
Adding connections to servers is easy: Create, configure and distribute the sessions as described herein. Furthermore, NoTouch Center manages client firmware images ("firmware" refers to the client operating system, such as NoTouch OS) in a very elegant way: Within the client base settings, you specify the firmware image to use; NoTouch Center will then decide what to do and update/change if nessary.
Inheritance
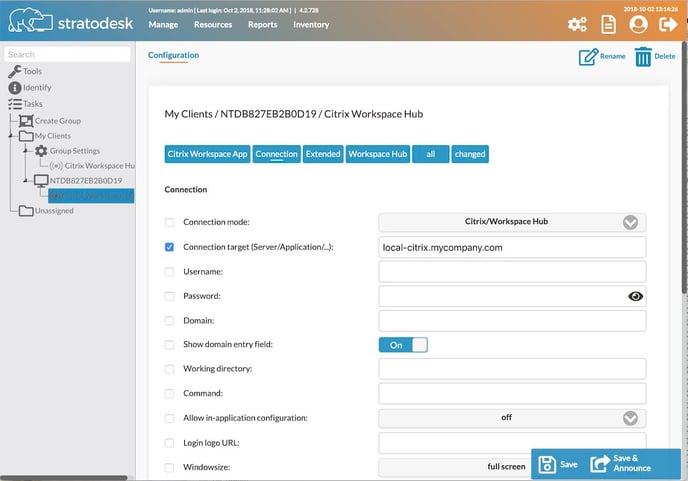
One of the pillars of our solution is NoTouch Center's inheritance. You already have noticed that clients are ordered hierarchically in a tree-like structure. Clients inherit from groups, groups inherit from higher groups, and the topmost groups inherit from the system default values. You can - at any level - set your own value; that will have an effect on the current level and all levels below.
The small checkbox on the left next to the parameter values is significant: If checked, the value was set at this level; whatever comes from above, it will be ignored, the value set is the one to be used. If unchecked, the value shown is the one inherited and used; if the same parameter is changed in higher-level groups in our inheritance tree, the value will change instantly.
Said in other words, activating the checkbox cuts off the inheritance tree. This relatively simple but powerful paradigm allows to manage large numbers of client devices. Best practice is to group clients in a logical way that suits your configuration well, the more general settings are, set them as high as possible in your tree, and move the more specific, the more seldomly used values down.
To illustrate, if all your uses share a certain terminal server connection, then this certainly belongs into a top-level group. If you have 5% of users who work with Spanish keyboard layout instead of US english for instance, create a group named "Spanish keyboard clients" as a subgroup of the top-level group, and only (!) set the keyboard layout to Spanish - do not set the terminal server values again. So, if in say one year you migrate your terminal server, you only need to change it at the top group, and all client devices (including those with Spanish keyboard) will get the new configuration without additional work for you.
Extension
Extension
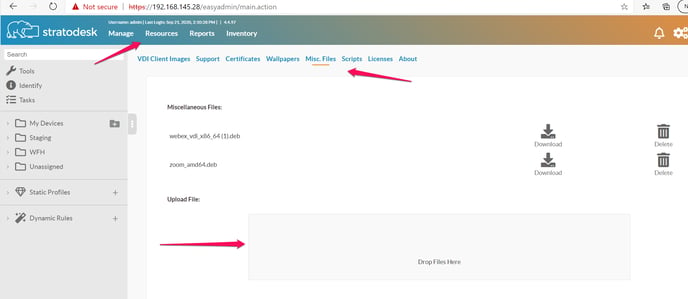
Is a method to integrate a limited number of 3rd party applications into NoTouch OS, programmatically from NoTouch Center. For those that are listed in NoTouch Center, you can locate the appropriate .deb file URL, or use the NoTouch Center file store.
Using the Notouch Center file store is the easiest. Once you have located the appropriate file, you can upload this to the NoTouch Center "Misc Files"
You may also want to review this blog post.
Once the appropriate extension file has been uploaded, you will then be able to select the Extension that is to be used by selecting the Extension tab, the "checkbox" for the targeted Extension and select the file from the drop-down 'Choose File' option (in this instruction we used Zoom)
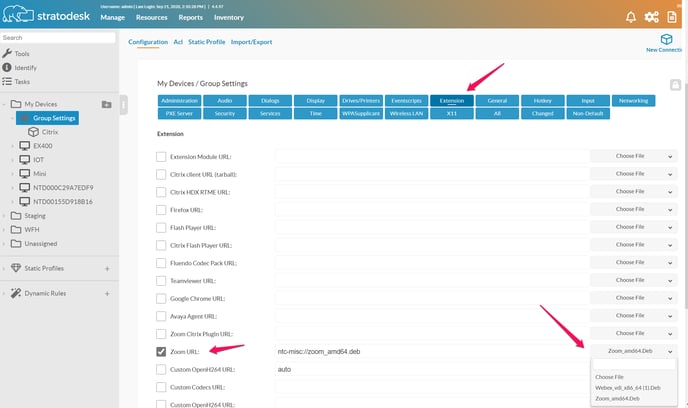
You can now choose the "connection mode" for the selected Extension
Not all of the Extensions are Connection Mode settings, some may appear under "Services"
After announcing this configuration change, the Endpoint will need to be rebooted to allow for download of the Extension to be operational. If after rebooting and selecting the connection, you receive an error "The installed operating system build does not contain your selected software package", you will need to verify that the appropriate .deb file can be downloaded
*Note If you do not have certificates installed for your NoTouch Center - EndPoints, You will need to disable "Check Certificates on Download" under the Security tab.
Static Profiles
Static Profiles
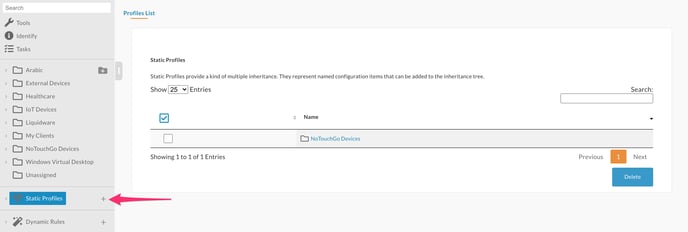
Static profiles are effectively connections & group settings that can be subsequently applied to groups. The use of static profiles is particularly helpful when you have multiple top-level groups and you don’t want to use group inheritance. Once a ‘Static Profile’ has been applied to a group, you still have the option of making changes to the standard ‘Group Settings’ for the group.
To create a ‘Static Profile’ click the + button and give your ‘Static Profile’ a name.
Once the static profile has been created, you can then configure the ‘Group Settings’ & ‘Connections’ in the same way you would do for any group.
Once you have set the parameters you want to apply, you then need to add this to the group.
To do this, browse to the group, then ‘Group Settings’ then ‘Static Profile’, highlight the ‘Static Profile’ you want to add and click the ‘Add’ button.
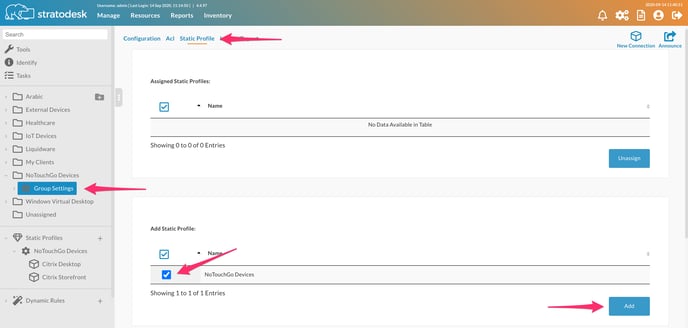
Once added, you should see a green notification at the bottom of the browser window and the ‘Static Profile’ listed under ‘Assigned Static Profiles’
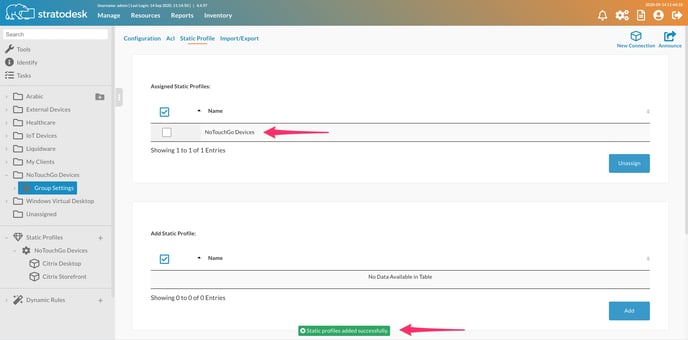
To unassign the profile, select the profile you want to unassign, and click the unassign button.
Dynamic Rules
Dynamic Rules
Dynamic Rules are like virtual groups, assigning configuration to any managed device, provided it matches the specified criteria. Unlike ‘Static Profiles’ that are assigned to a group, ‘Dynamic Rules’ are applied automatically. To create a ‘Dynamic Rule’ click the ‘+’ sign and give it a friendly name.

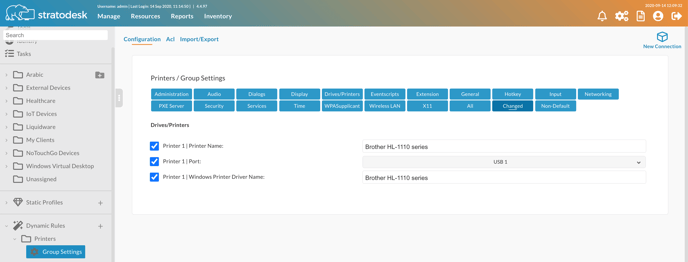
The configure the ‘Group Settings’ or ‘Connection’ that you wish to automatically apply.
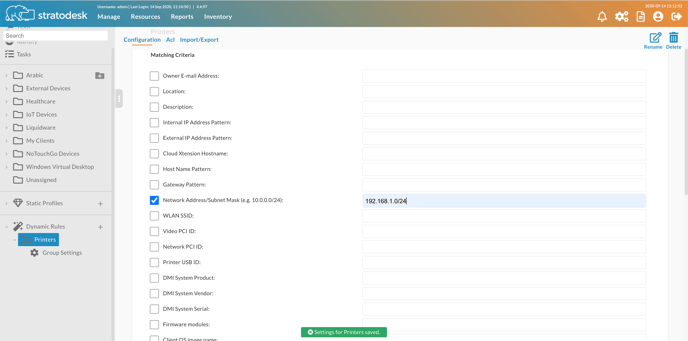
To apply the settings, select the ‘Matching Criteria’ which is very much like ‘Automatic Assignment Rules’ so in the example below it will add printers to ALL devices on the 192.168.1.0/24 network.
Likewise, it could also be applied to specific hardware using ‘DMI System Product’ or ‘DMI System Vendor’ and this information is found on the ‘Info’ tab of your registered NoTouch OS devices.
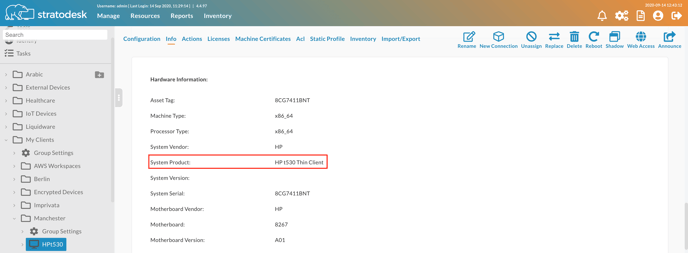
So, with that example you would add ‘HP t530 Thin Client’ in the ‘DMI System Product’ field. The settings would automatically be applied to all HP t530, but any other device would remain unaffected by the ‘Dynamic Rule’

Connect clients and NoTouch Center
To actually manage clients via NoTouch Center, you need to connect them to your NoTouch Center. No worries, this is simple and can be done in a fully automated way!
Before you start, however, please make sure your URL Prefix value is set up correctly - please see here: URL Prefix
Communication is done via HTTPS or HTTP. Thus, it all boils down to making NoTouch Center's service URL available to the clients. This can happen in multiple ways:
- The tcmgr host name. This works really well in corporate networks, no matter if small or big. Basically you create a DNS A or CNAME record pointing to your NoTouch Center installation. Any factory-new client or fresh installation will always try to contact "tcmgr". More on that here: tcmgr
- E-mail based management server lookup. If you intend to manage machines in the Internet, such as with home office workers, this is great. It allows end users to simply type in their corporate email address and the management URL will be found via DNS SRV records.
- Search for client devices. NoTouch Center can search for clients using a proprietary UDP-based discovery protocol.
- Manual entry in First-Time Wizard. see here: NoTouch OS QuickStart#Central Management
- Manual entry in the configuration. Log in to a client's Configuration, navigate to Services -> NoTouch Center and set the "Management URL" parameter.
The mere connecting of client and NoTouch Center does not have an effect on clients' configuration. There is no need to worry that this will change the client's behaviour. Directly after connecting clients to NoTouch Center, it will place the client among the "Unassigned" clients, which means no configuration is done. However, adding clients to a group changes the situation: If you decide to add a client to a group, the client will immediateyl inherit the group configuration and all configuration settings done on the client will be overwritten.
Thus, only clients explicitly (by human action or Autoassign) placed into a group will be configured. Clients configured by NoTouch Center are configured only by NoTouch Center and any local administrator changes are overwritten. However, clients are never placed incidentally into a group: you decide if and how you want to do this: manually or automatically, but it is always your decision.
That said, the tcmgr and workgroup deployment methods together with Autoassign allow for a fully automated rollout without even seeing the First Time Wizard.